
In a previous article, WebSocket and Lock it! we showed how to use basic authentication on websocket calls to an application deployed on TomEE.
In this article, we explain how to add SSL/TLS security to the connection between the client and the application server. To demonstrate this, we’ve created a new wss-secured-websocket project. This work is valid both for Secure Websocket (WSS) and HTTPS.
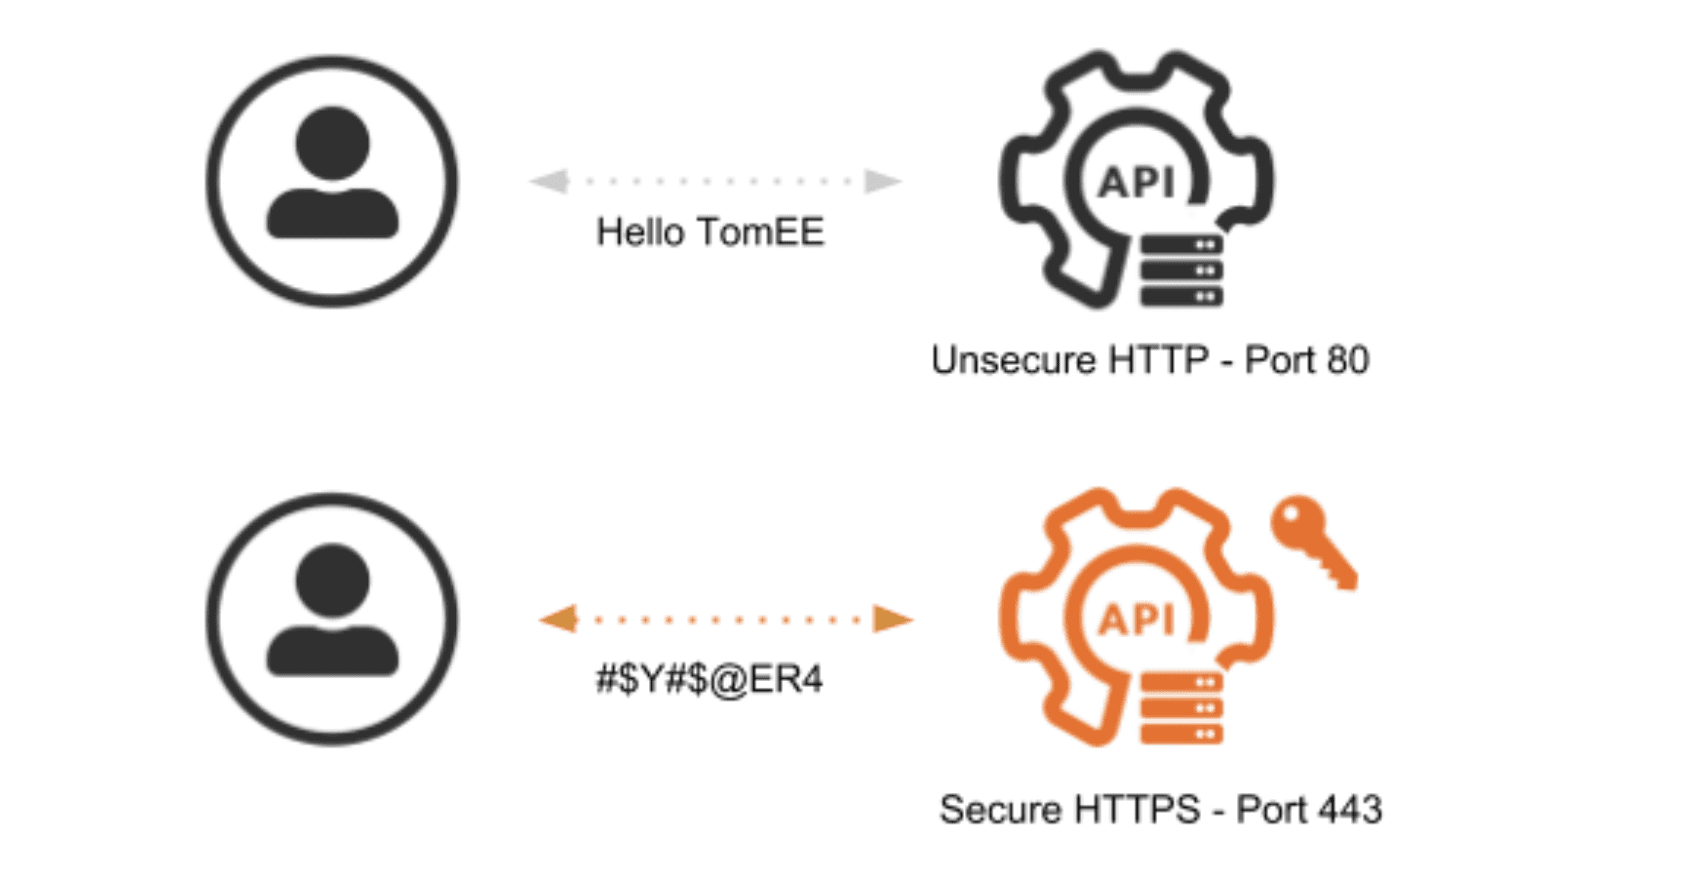
Adding transport layer security is important in order to protect the data exchange. Payloads and headers are sent in clear text when using simple HTTP. This is critical when considering the authentication header. As you can see here, basic authentication sends the username and password encoded in base64, which is a simple encoding algorithm that is easily decoded:
$ echo -n 'tomee:tomee' | base64
dG9tZWU6dG9tZWU=

$ echo -n 'dG9tZWU6dG9tZWU=' | base64 -d
tomee:tomee
To prevent a third party from decoding the authentication header and stealing the credentials, the use of SSL/TLS.
SSL/TLS
Secure Socket Layer (SSL) and Transport Layer Security (TLS) refers to the handshake that takes place between a client and a server. The handshake doesn’t actually do any encryption itself, it just agrees on a shared secret and the type of encryption that is going to be used. TLS is just a new name for SSL v4 – essentially, we are talking about the same protocol. Apart from WSS and HTTPS, the SSL/TLS protocol is also used by other services, like SMTPS (Secure, Simple Mail Transfer Protocol) and FTPS (Secure, File Transfer Protocol).
The security of the connection is ensured by the data encryption. For that, the server needs an SSL/TLS certificate binding the identity to a key pair: the public and private encryption keys. The certificates are not dependent on the protocols and can be used with SSL and TLS.
On production servers, you will need a certificate created by a Certificate Authority (CA), someone that will verify that you are a good guy. The CAs have their own certificates in order to:
- Issue a trusted public key, placed in web browsers like Firefox or Chrome or in the trusted certificates of the JRE at
$JAVA_HOME/jre/lib/security/cacerts. - Issue Certificate Signing Requests (CSR) used by your server in the encryption process.
In the demo project, you have the instructions to create a CA and CSR certificates and the files created in the process, for demonstration purposes. In the end, you will have a keystore with the certificate chain and the private key stored, in the case of the demo, under the alias tomcat.
If you place the public key of the generated CA certificate in the browser trusted store, the encrypted communication will also be validated as originated in a trusted party, showing a green message in the address bar.
During development, it self-signedor developers to use a self-signed certificate for their servers. Instructions to generate a keystore with a self signed certificate are also available on the project. This places a single-element certificate chain for localhost and a private key under the alias tomcat, the one we use in the demo project.
Configure SSL/TLS on TomEE
To get started, we need to set up basic authentication configuration from the secured-websocket project previous article. In the previous article we showed, among other things how to:
- Set the
src/main/webapp/WEB-INF/web.xmlfor basic authentication in the app. - Set the
src/main/conf/tomcat-users.xmlwith the server side user credentials. - How to send the authorization header with the credentials in all client requests.
You can clone the new project for this article with Git:
$ git clone [email protected]:tomitribe/wss-secured-websocket.gitAnd build it with Maven:
$ mvn clean installThe WebSocketResourceJEE7Test will be executed. You can also run it on your IDE.
Apart from the configurations, we did before, now we have a keystore.jks file and we need to configure the server.xml from TomEE. All this can be found in the wss-secured-websocket/src/main/conf folder of the project.
To activate SSL/TLS we need to activate the related connector in the server.xml.
<Connector port="8443"  protocol="HTTP/1.1"
          SSLEnabled="true" URIEncoding="UTF-8"
          maxThreads="250" scheme="https" secure="true"
          keystoreFile="conf/keystore.jks"
          keystorePass="123456" keyAlias="tomcat"
          clientAuth="false" sslProtocol="TLSv1.2" >
The default for TomEE is TLS, effectively disabling the older, weaker SSL versions. For this example, we are forcing TLSv1.2. The last version is TLSv1.3 but was only finished in August 2018.
For detailed information on all the fields of the connector check the Tomcat 8 Connector Help.
Activate SSL/TLS on the websocket client
On the WebSocketResourceJEE7Test of the project we use a JEE websocket client. We have to add user properties for the keystore and its password to use with WSS:
//use same keystore as the server
authorizationConfiguration.getUserProperties().put("org.apache.tomcat.websocket.SSL_TRUSTSTORE",
       "src/main/conf/keystore.jks");
authorizationConfiguration.getUserProperties().put("org.apache.tomcat.websocket.SSL_TRUSTSTORE_PWD",
       "123456");
As you can see here:
new URI("wss", uri.getUserInfo(), "localhost", PORT, "/example/socket",
       null, null)
We are connecting to the localhost and if the CN (commonName) in the certificate is not localhost, you will get a sslEngine exception with the websocket client.
Testing with SSL/TLS with Arquillian
On the arquillian.xml we are telling the testing framework to copy the configuration to the test server by defining:
<property name="conf">src/main/conf</property>
This way there will be no difference between the testing configuration and a server that you configure yourself.
The project uses the self-signed certificate keystore we placed on the configuration folder. The other Keystore in that folder is the one we created with our own CA for the *.example.org domain.
You can change the project to connect to your own www.example.org by:
- Editing your /etc/hosts and tell your computer it’s also www.example.org by adding:
127.0.0.1 www.example.org
- Rename keystore.jks.ca-cert to keystore.jks
- Update the hostname on the test to www.example.org from localhost at:
new URI("wss", uri.getUserInfo(), "localhost", PORT, "/example/socket",

null, null)
This is all for now.
Stay tuned for more security related posts!