
I’m going to try something different in this article. I’m going to use lots of images as a reference for readers. I have not done that before, but I’ve found when I’m learning something new that it can be very helpful.
A big hurdle for me personally, as a Java EE developer, is debugging server-side code from an IDE. In this tutorial, I’m going to show you step by step how to set up Eclipse for “remotely” debugging Java EE applications. I put remotely in quotes because in this article you are really running TomEE on the same machine as Eclipse, but not in the IDE itself. In a future article, we hope to provide more advanced guidance on how to run Eclipse on your machine and debug an application running in TomEE on some other machine such as one in the cloud.
If you already know Eclipse then you have a big head start on the rest of us. Just skip ahead when necessary. If you haven’t used Eclipse or have never done remote debugging, have no fear, follow this tutorial and you will learn enough to get started.
There are a few we are going to do in this article to get you up and running with remote debugging. I’ve broken these into six short sections each one preparing you for the final session when you do the actual debugging.
- Section 1: Download, install and run TomEE
- Section 2: Download and Install the Eclipse IDE for Java Enterprise Development
- Section 3: Configure Eclipse IDE to run TomEE remotely
- Section 4: Test Run TomEE in Eclipse
- Section 5: Create a Java EE Web App
- Section 6: Remotely Debug an App on TomEE with Eclipse
Section 1: Download, install, and Run TomEE
Tomitribe provides support for open source and, in particular, Apache TomEE a Java EE Application Server, so we’ll use that as our Java EE application server.
1. Download the TomEE PluME application server
If you do not already have TomEE installed have no fear, it’s pretty easy to set it up.
- Open your browser and go to tomee.apache.org’s download page.
- Select the latest version of TomEE Plume (8.0.0 M1 as of this writing) and the type of archive file you prefer (TAR.GZ or ZIP).
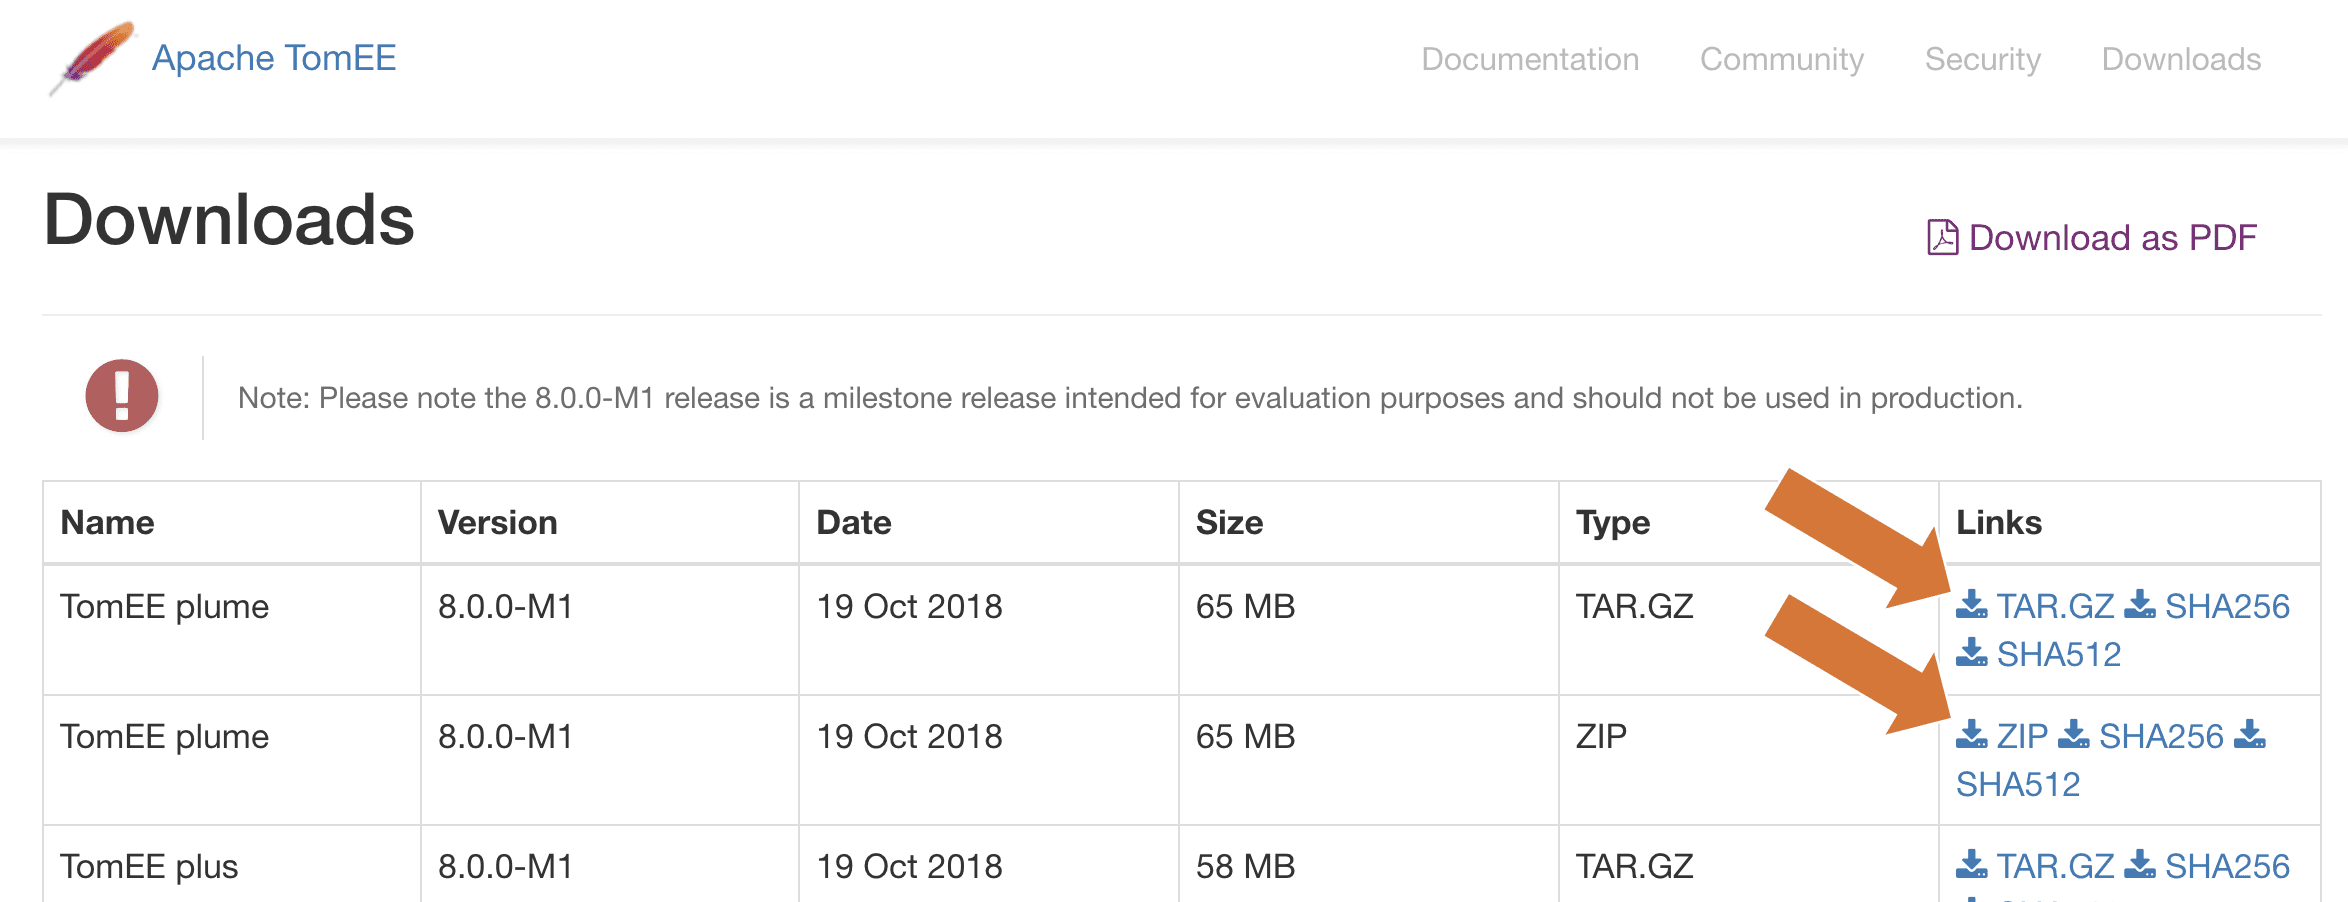
Note: If you are wondering what the difference is between the various TomEE platforms, check out this page.
2. Extract the TomEE Archive
You can choose a different directory if you prefer, but the tutorial will assume you are using the desktop.
- Move the archive to your desktop and expanded or unzip it. You should now have a directory with a name like “apache-tomee-plume-<whatever version>” on your desktop.
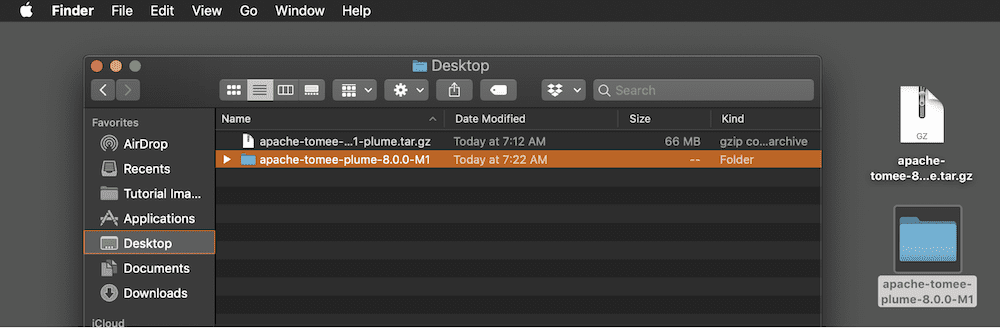
WARNING: Don’t rename the TomEE directory. When I did that, thinking it would make things simpler, the command to start TomEE would not work.
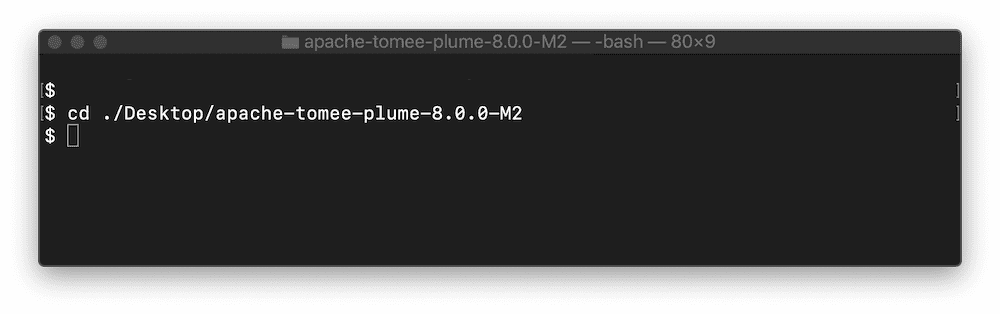
3. Open up a command line prompt and navigate into the apache-tomee-plume directory.
- On Mac OS X navigate to or search for the “Terminal” and open that. Then change directory into the apache-tomee-plume directory you just created using this command
$ cd ./Desktop/apache-tomee-plume-<whatever version>.
4. Start TomEE to make sure it’s working.
- On Mac OS X execute the following command
$ ./bin/catalina.sh run

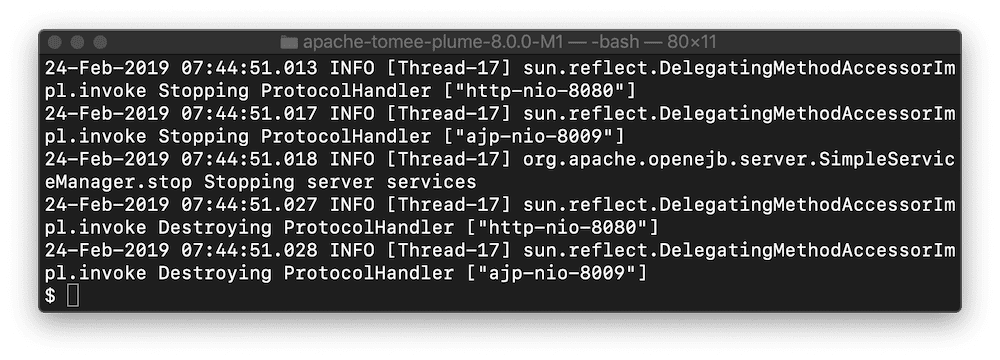
- If you see the output shown below, then all is well – notice that TomEE started very quickly (in my case in less then 1000 ms or 1 second)!
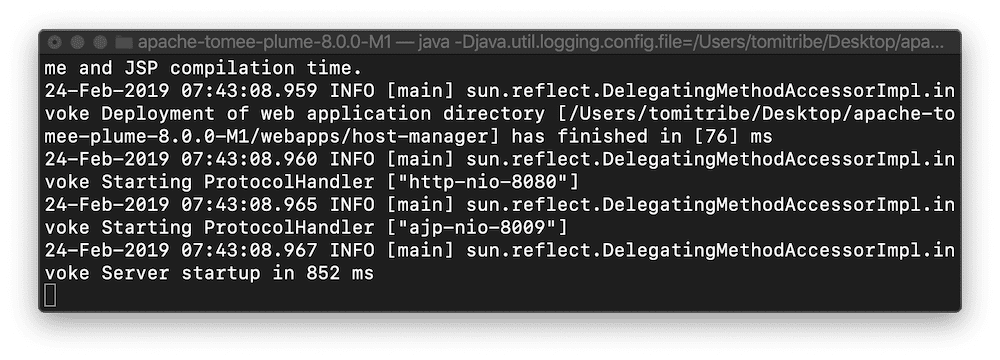
Note: Catalina in part of Apache Tomcat and is used to start, stop, and manage the Tomcat server. TomEE is built on top of Tomcat so starting Tomcat, in this case, also starts TomEE.
5. Stop TomEE
You will need to stop TomEE now so that Eclipse can start it for you later. If you don’t stop it now, then when you try to run it from Eclipse it won’t work.
- On Mac OS, make sure the Terminal app is active and type Cntrl + C and hit the return button.
Section 2: Download and Install the Eclipse IDE for Java Enterprise Development
If you already have the Eclipse IDE installed then make sure you have the “Eclipse IDE for Java Enterprise Developers” or the older “Eclipse IDE for Java EE Developers”. Either should work fine. If you don’t have that then go ahead and download and install it.
Warning: You should be able to download a different version of Eclipse without losing any other work you are doing but make sure you backup your Eclipse workbench code before proceeding.
1. Download the Eclipse IDE for Enterprise Java Developers
- Find the “Eclipse IDE for Enterprise Java Developers” download link on this page.
- There are three operating systems that they have to download for Mac OS, Windows, and Linux so select the right one for you.
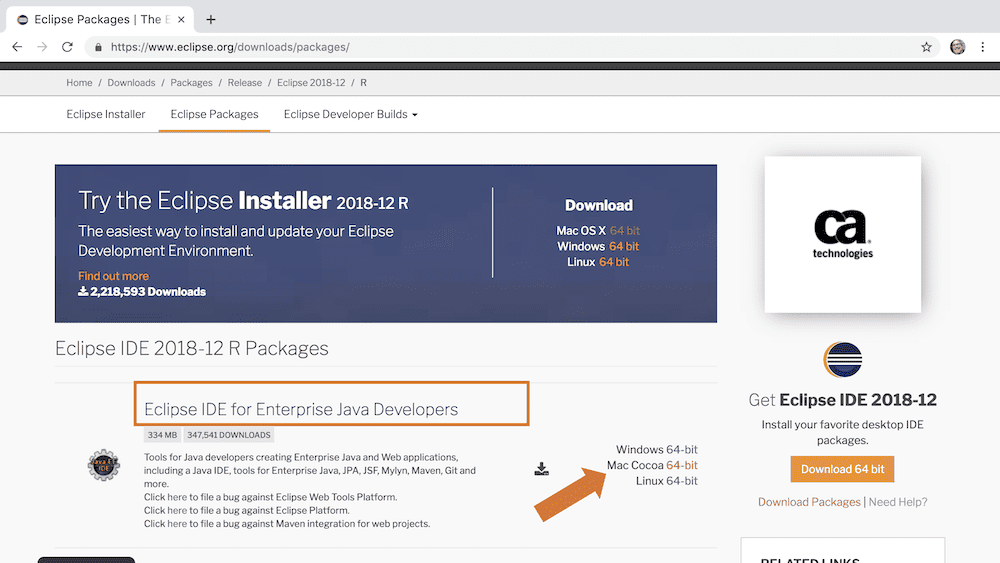
Note: The software you want is the latest Eclipse IDE and the specific package is the “Eclipse IDE for Enterprise Java Developers”. If that link is broken (they change the navigation now and then) just google “download ‘Eclipse IDE for Enterprise Java Developers’” and you should find it.
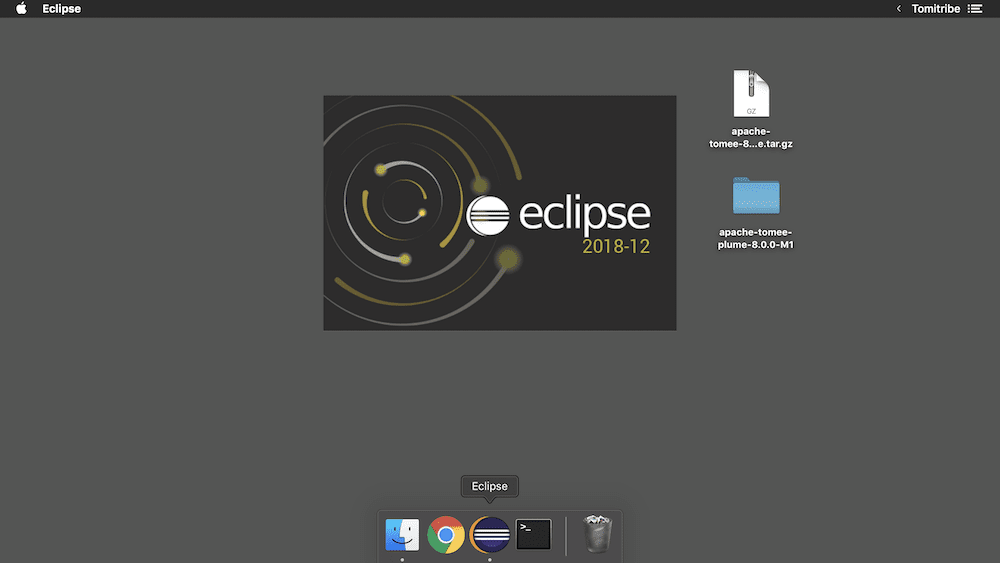
2. Install the Eclipse IDE
After you download the Eclipse IDE, go ahead and install it as you would any other software.
Section 3: Configure Eclipse IDE to run TomEE remotely
The next step is to Connect your Eclipse IDE development environment to the TomEE application server you already installed on your Desktop.
1. Go to the Eclipse IDE Workbench
-
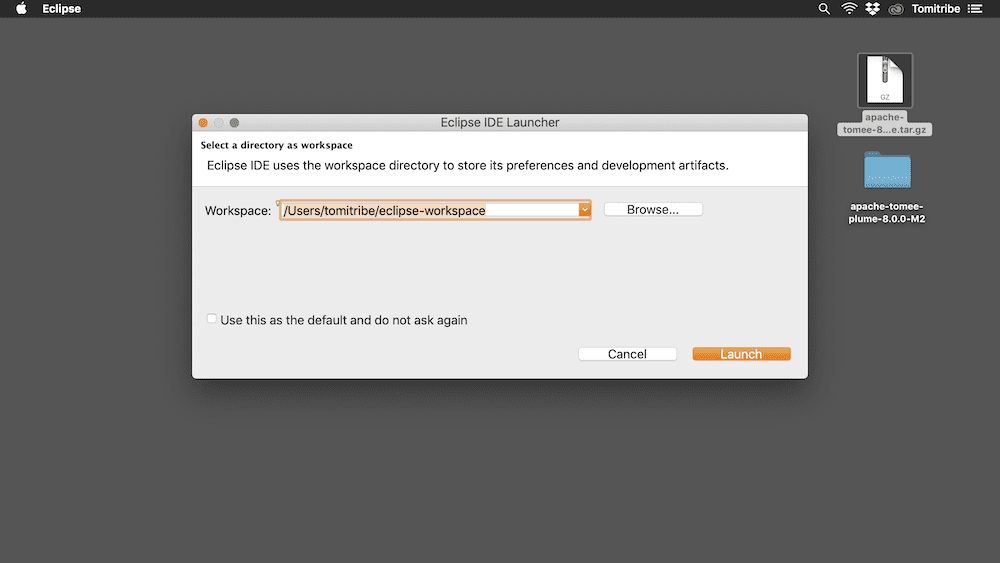
- Open the Eclipse IDE application.
-
- Select a location to store your project files (I always use the default).
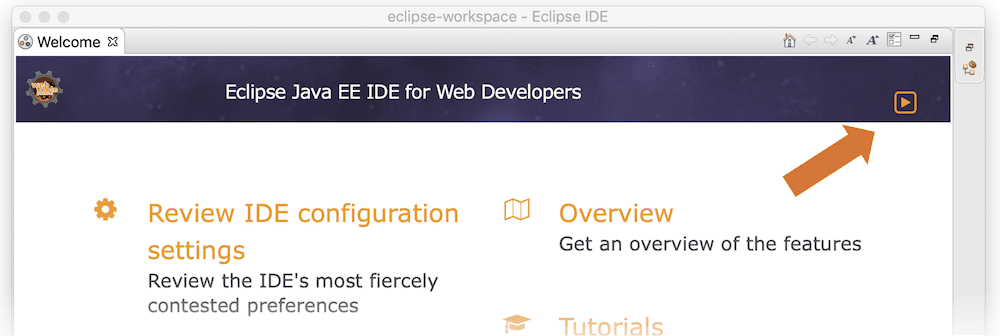
- On the top right corner of the Welcome page click on the “Workbench” button
2. Create a Dynamic Web Project
- On the Eclipse menu (at the top) go to File – New – Dynamic Web Project.
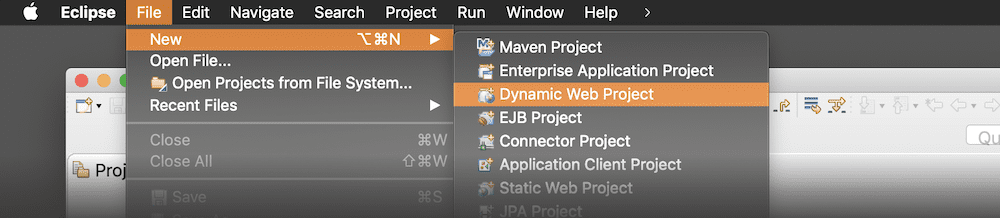
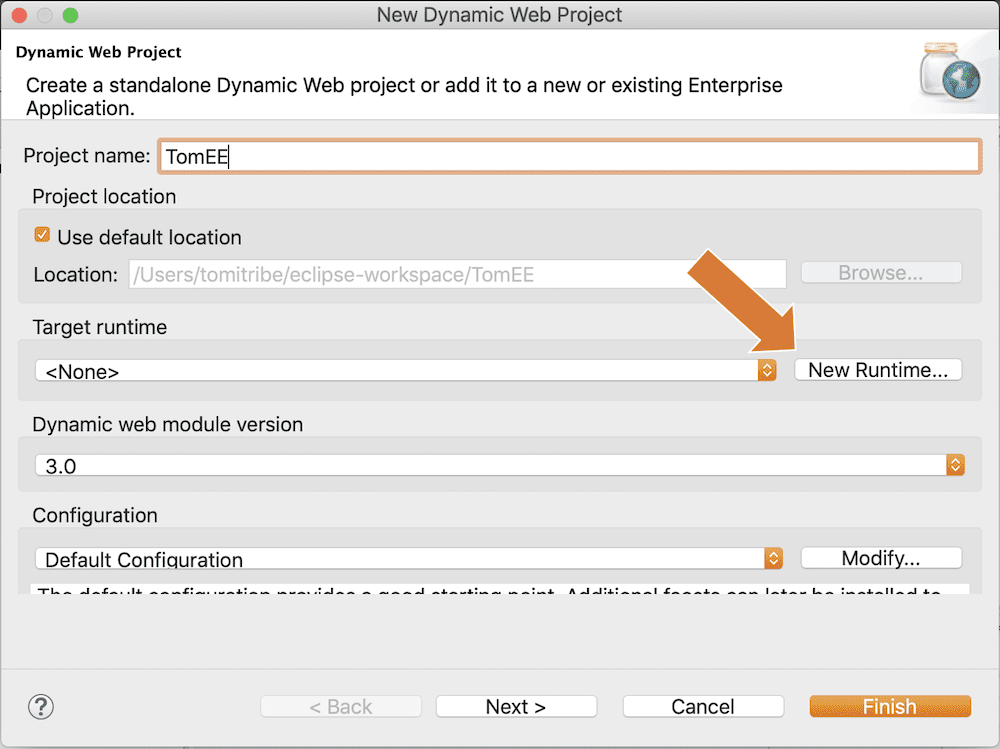
- Enter “TomEE” for the project name.
- In the “Target runtime” section Click on the “New Runtime…” to open the “New Server Runtime” dialog window.
- Expand the “Apache” folder and select the latest version of Apache Tomcat (in my case it was “Apache Tomcat v9.0”)
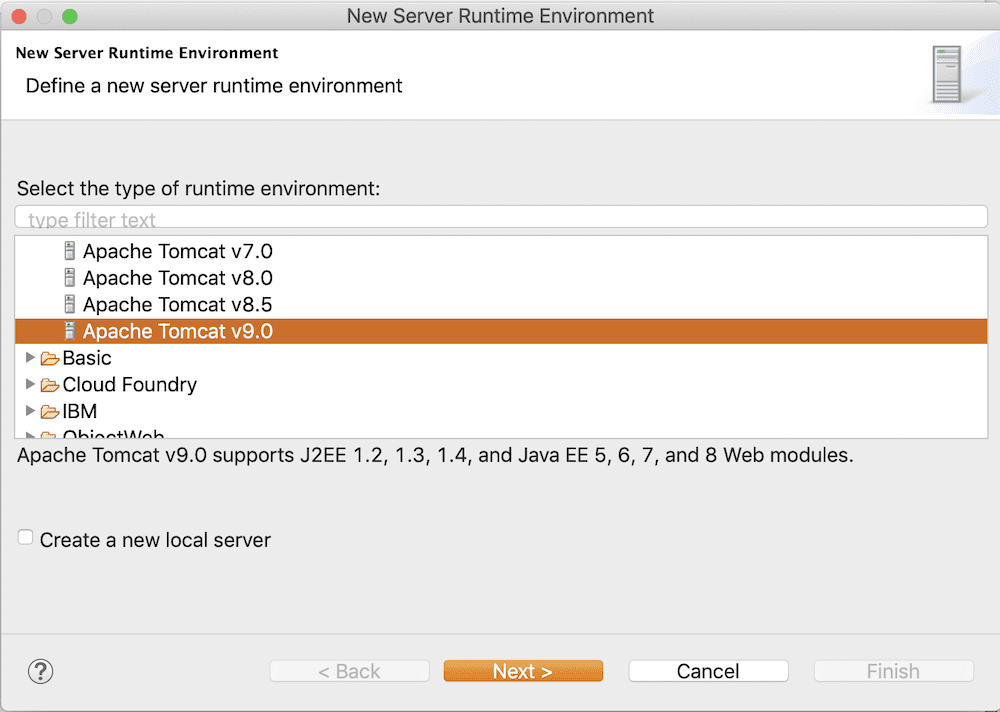
- Click on the “Next” button.
- Change the Name from “Apache Tomcat ” to “TomEE” so its obvious that this is Apache TomEE not just Apache Tomcat.
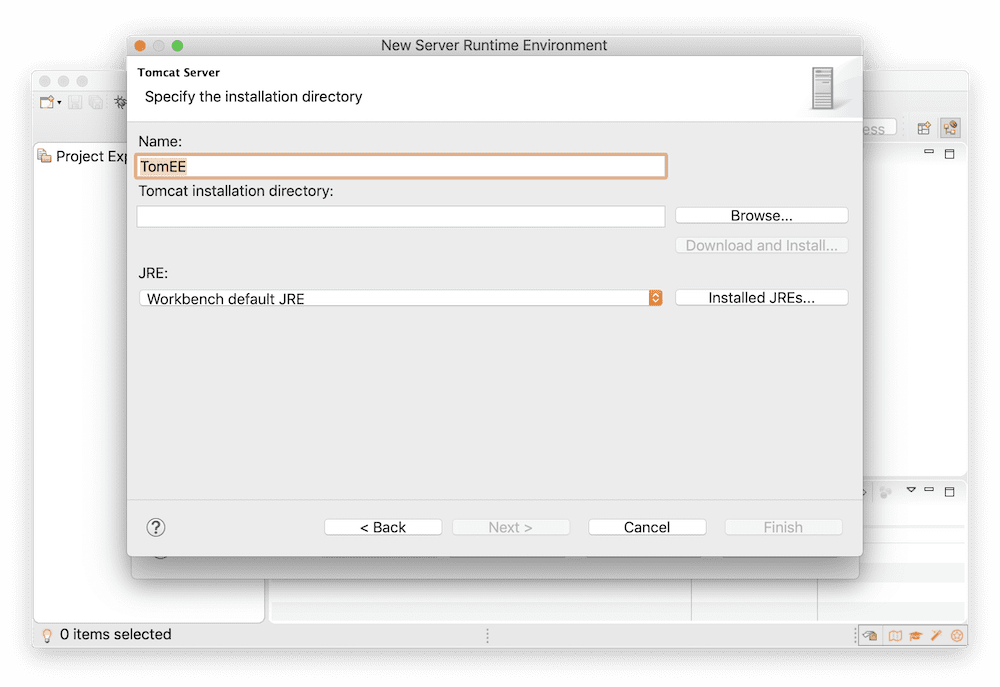
- For the “Tomcat installation directory” click the “Browse” button and select the “apache-tomee-plume-” folder on your Desktop.
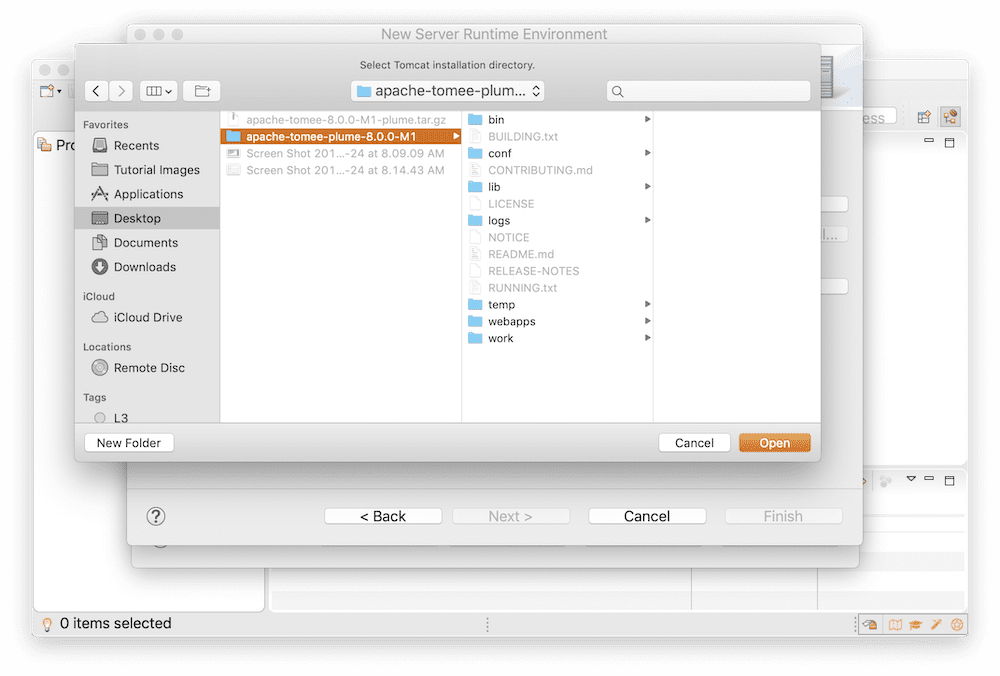
- Click on the “Open” button
- Click on the “Finish” button.
- Click the “Finish” button on the “New Dynamic Web Project” dialog window.
Section 4: Test Run TomEE in Eclipse
Before we learn how to debug your own application, we’ll test to ensure that the Eclipse IDE is properly connected to the TomEE application server and can run it remotely.
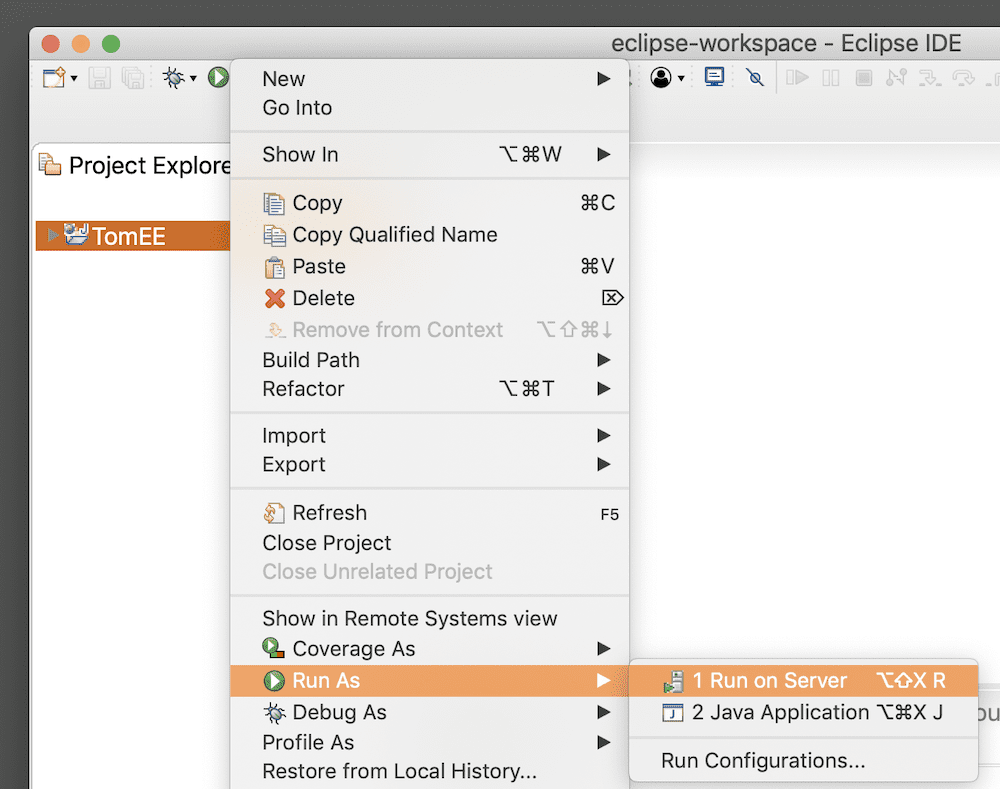
1. Open the “Run on Server” Dialog
- In the Eclipse project navigator (left side of IDE) right click on the TomEE project and go to Run As – Run on Server.
2. Set up and Run TomEE
- Open the Apache group and select the latest version of Apache Tomcat, which at this time is version 9.0.
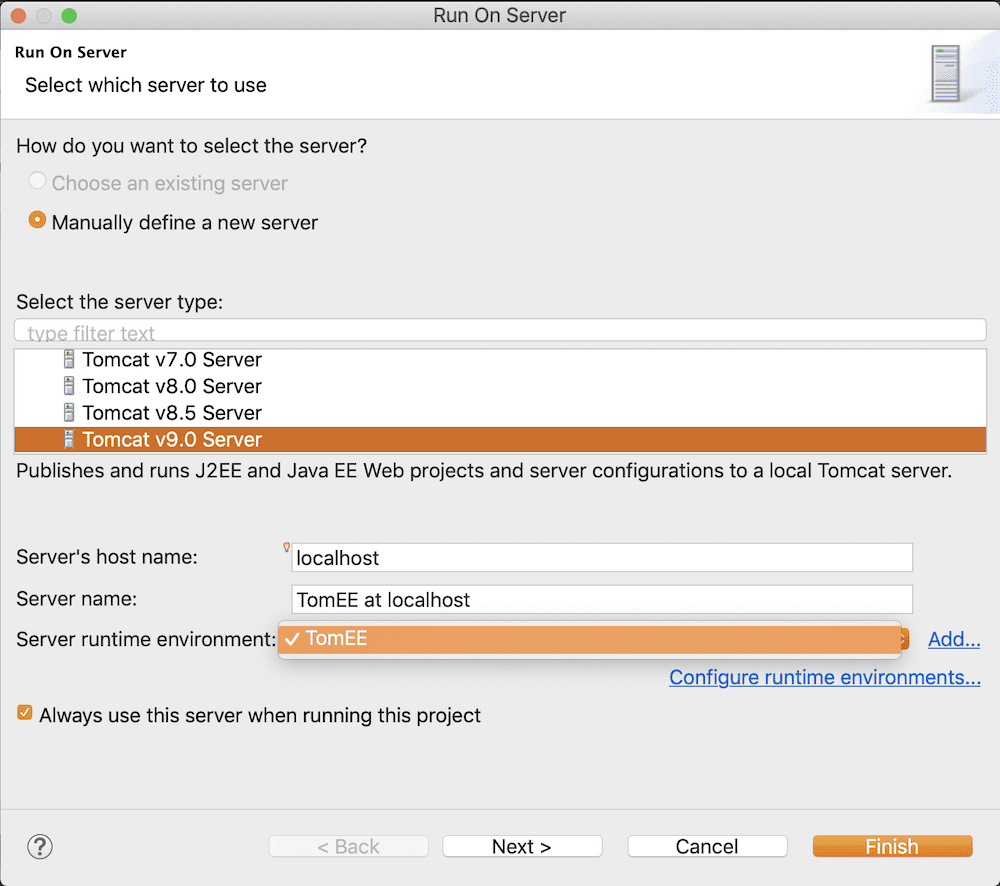
- Make sure the dropdown box labeled “Server runtime environment” has “TomEE” as the selection.
- Click on the check box next to the label “Always use this server when running the project” so you don’t have to deal with this dialog window again.
- Click the “Finish” button
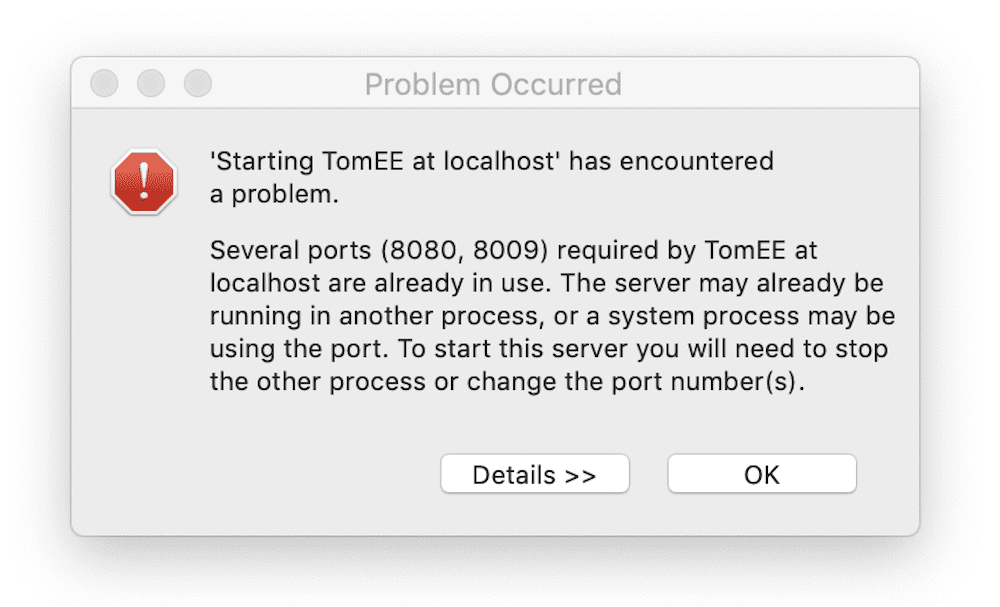
Note: If you get an error dialog box like the one pictured below it means that you did not stop TomEE when you tested it earlier in the tutorial. Go back to the command line of the running server and enter Cntrl + C.
Note: If you an error dialog box that says something about loading servers, just click the red stop buttons until the dialog goes away. I can’t reproduce this to show an image. You just downloaded Eclipse so you don’t need any updates at this time
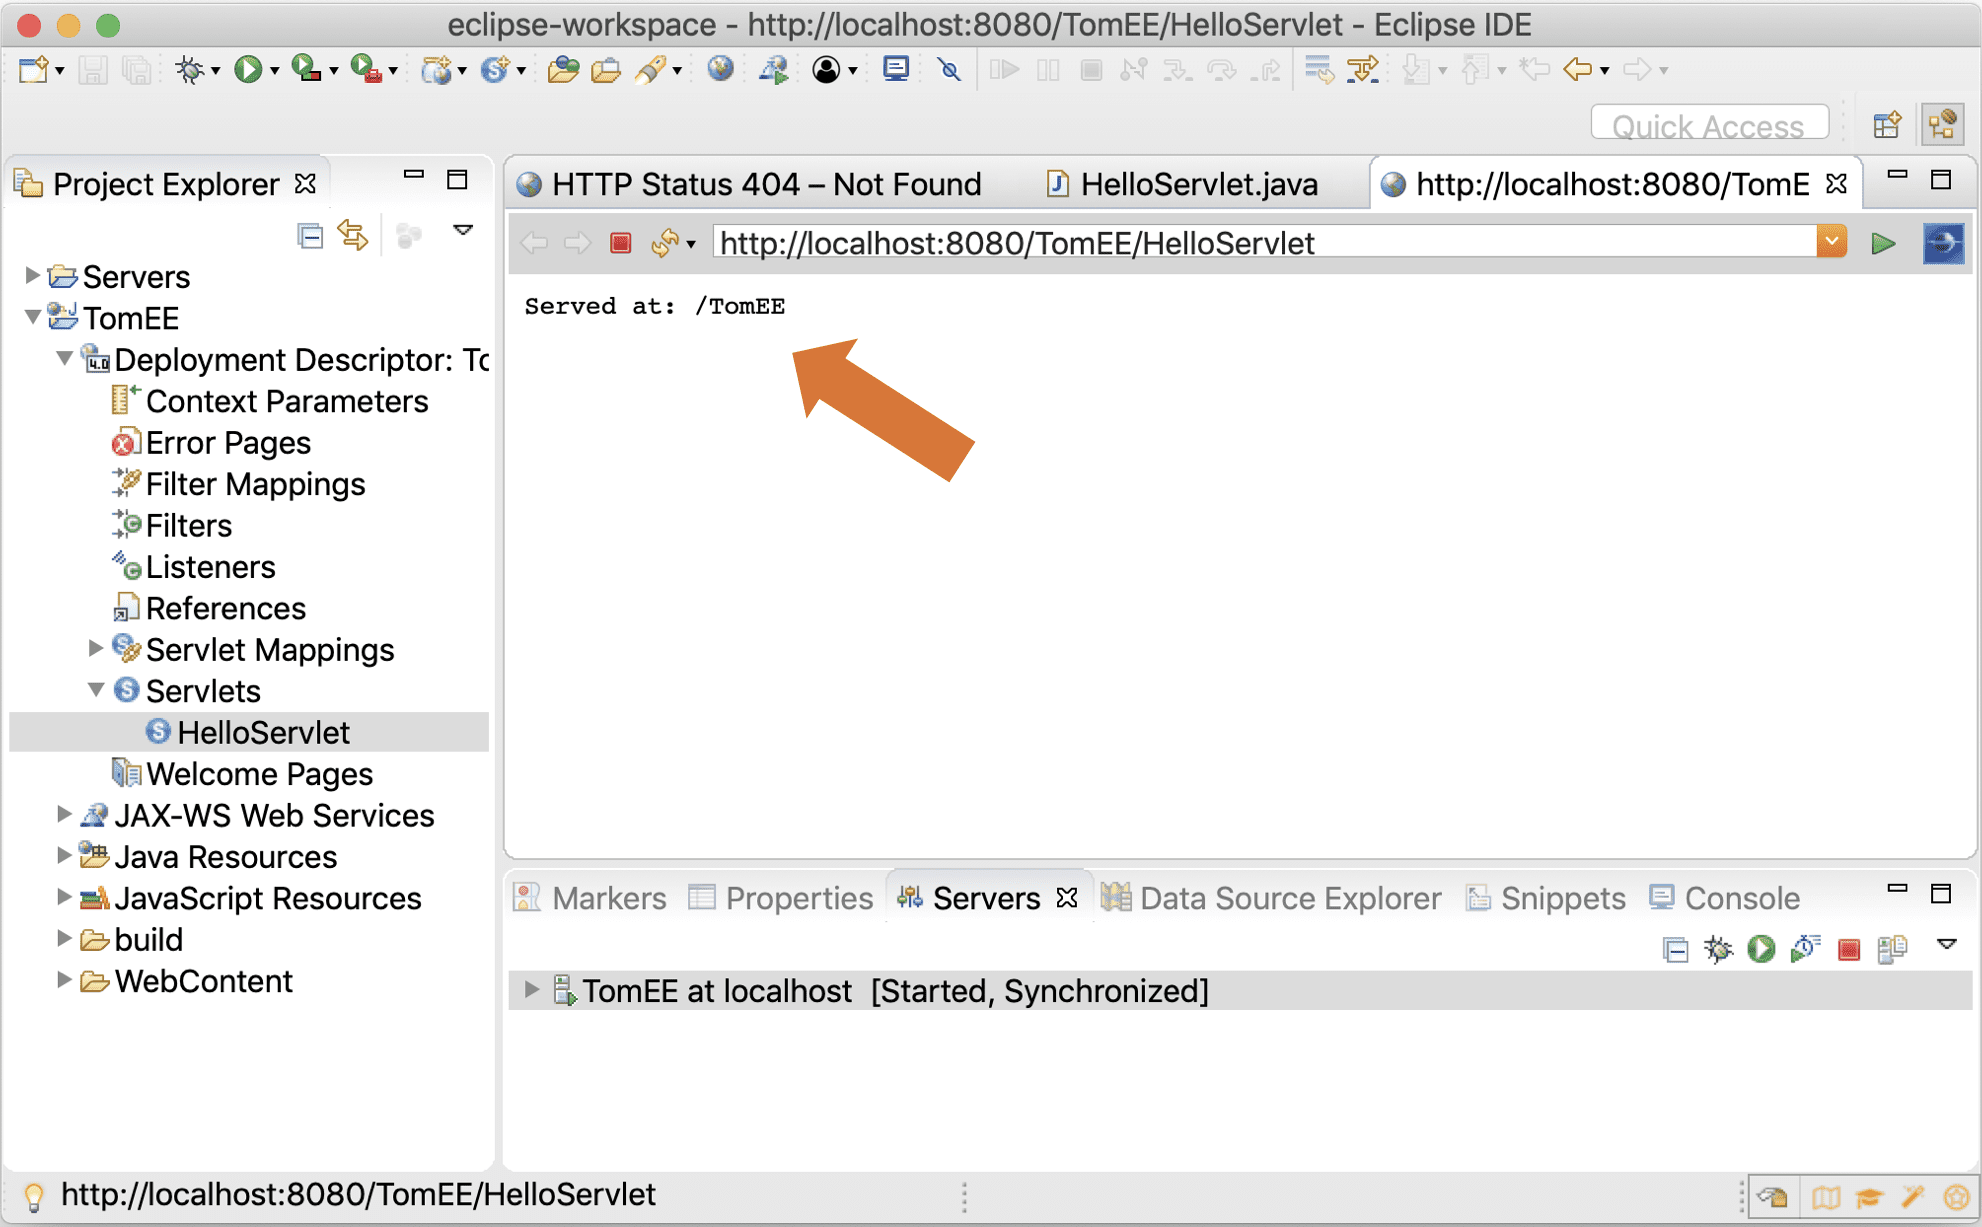
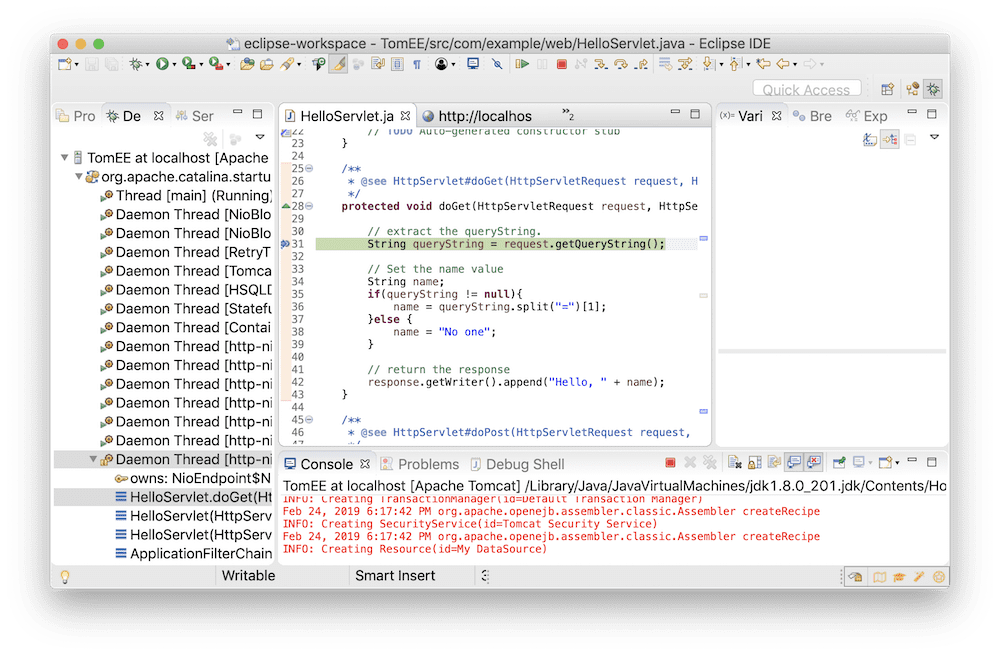
- If everything worked fine then the bottom panel in Eclipse will show the “TomEE at localhost” as Started and your Eclipse IDE will look like this:
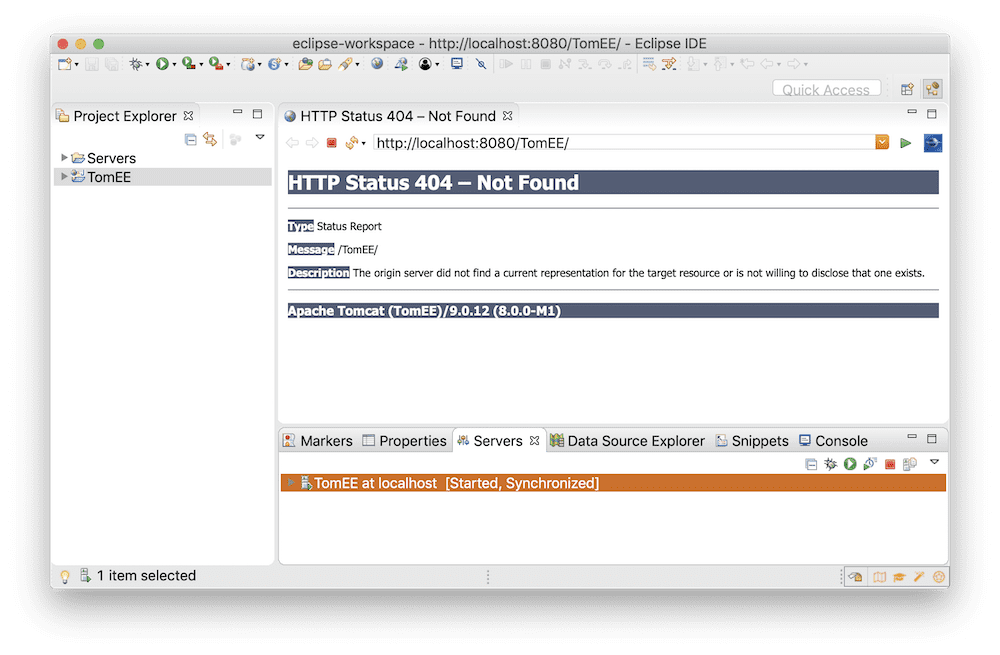
Note: Don’t worry about the 404 status code. You have not created an application yet in the TomEE project so there is nothing to display. The fact that it’s sending back the error code tells you that the server is working. More importantly, look at the bottom pane where it says “TomEE at localhost [Started, Synchronized]” that means you successfully started TomEE and have remotely connected Eclipse to it.
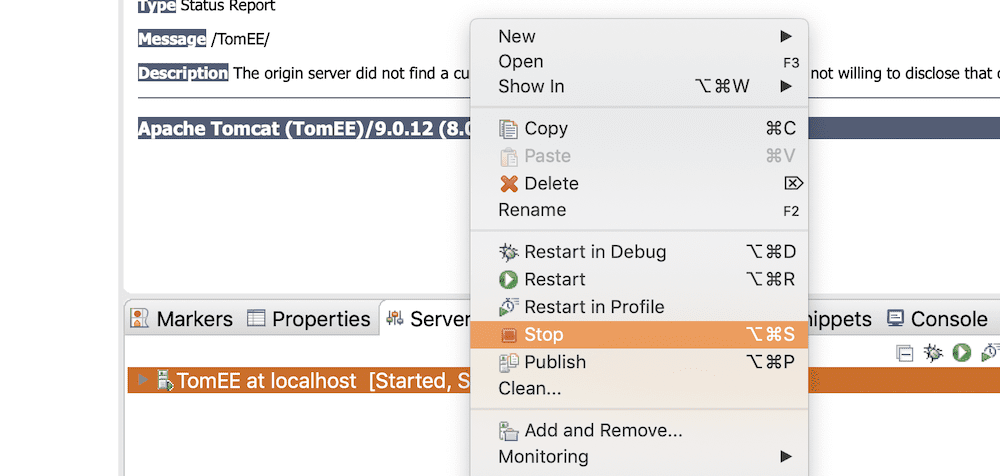
3. Stop TomEE
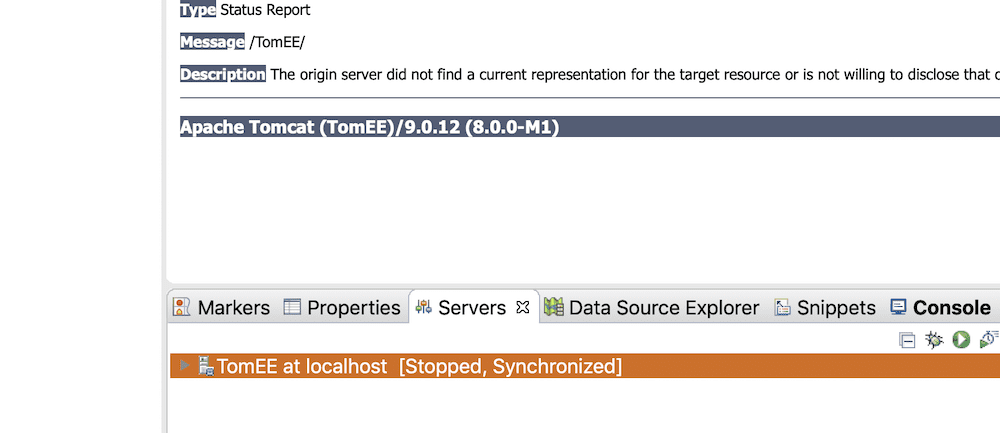
- You are going to have to stop the TomEE application server so that you can deploy a web app and test it in the next section. In the bottom pane where it shows the TomEE server, right click on it and select “Stop”.
- It should now say “TomEE at localhost [Stopped, Synchronized]”
Section 5: Create a Java EE Web App
Now that we know that Eclipse can run TomEE remotely, it’s time to develop a very simple piece of Java EE Web code for us to run and test.
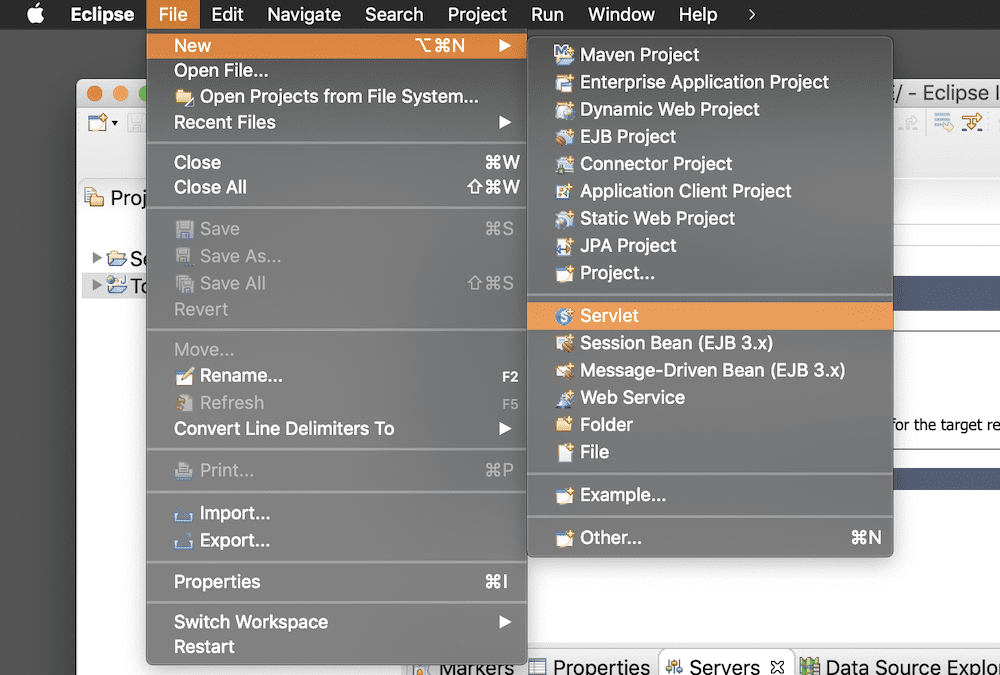
1. Open the New Servlet Dialog
- In the Workbench, click on “File” then “New” then “Servlet”
2. Enter Servlet Information
- The project should say, “TomEE”
- For the “Java package” type in “com.example.web”
- Name the class “HelloServlet”
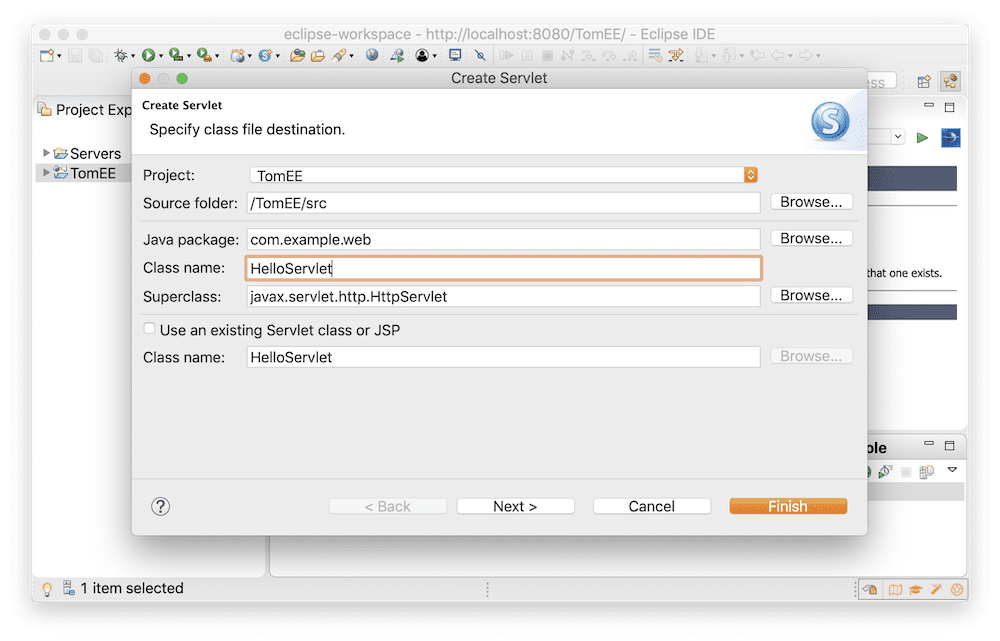
- Click the “Finish” button.
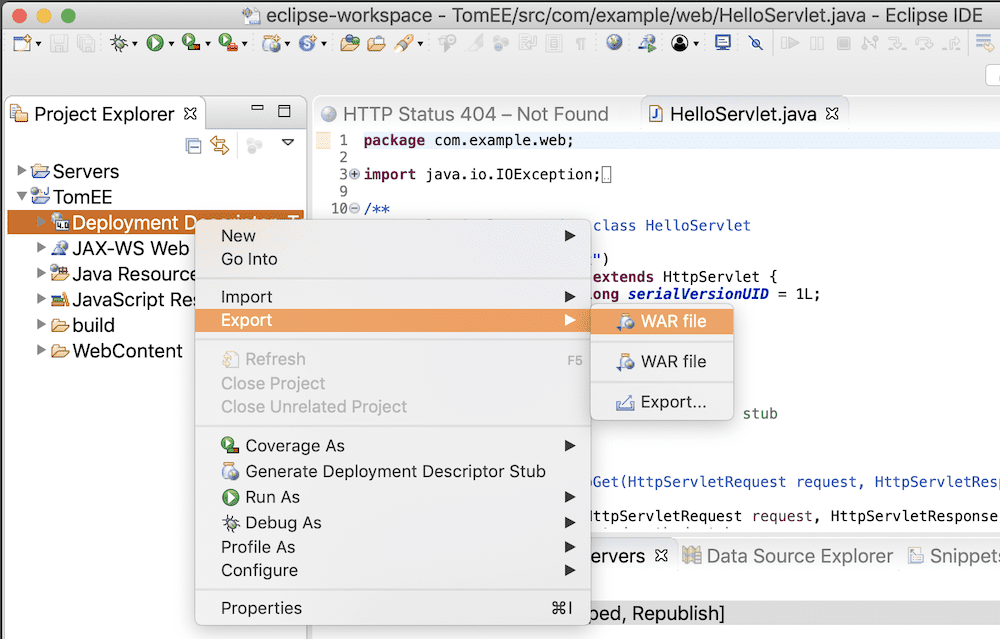
3. Deploy the HelloServlet to the remote TomEE
- Deploy the Servlet as a WAR file by right-clicking on“Deployment Descriptor: TomEE” in the Project Navigator and selecting Export – WAR File
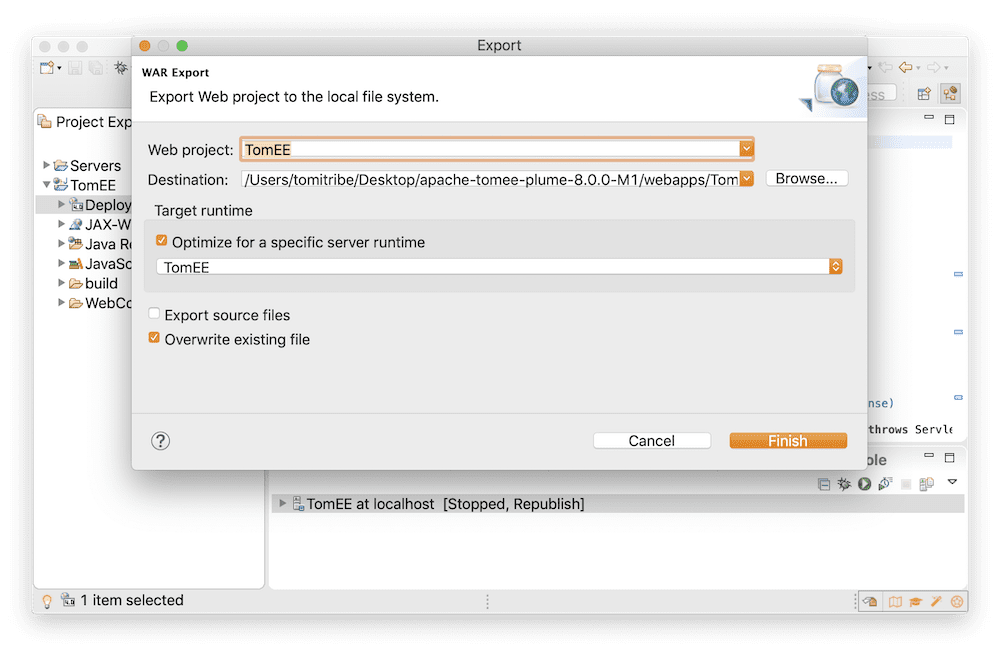
- In the “Export” dialog window the “Web Project” should be TomEE.
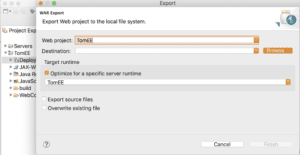
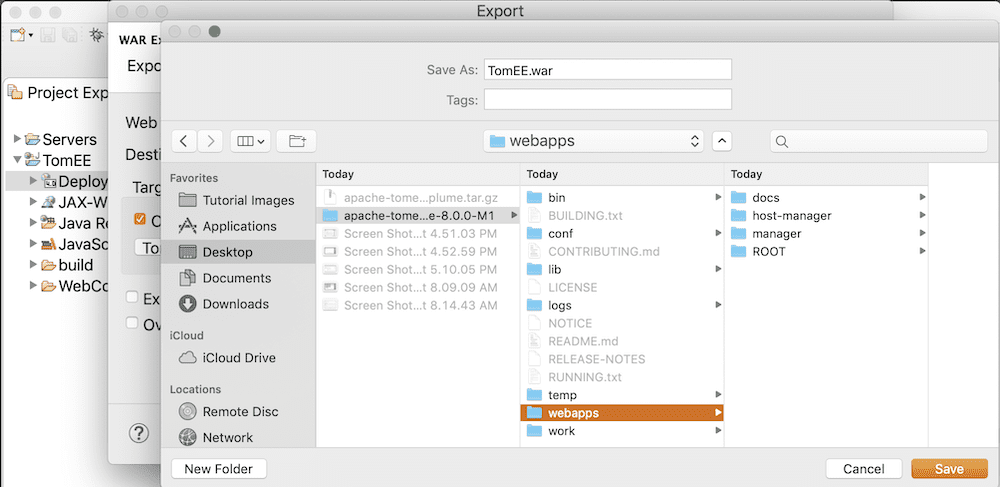
- Click the “Browse” button next to the “Destination” field and go to the apache-tomee-plume- directory on your desktop and select the “webapps” folder and click the “Save” button.
- In the “Target Runtime” section, check the box labeled “Optimized for a specific server runtime” and make sure the dropdown box shows “TomEE”. Also, select the checkbox labeled “Overwrite existing file” so that when you update the TomEE.war in the future it will overwrite the one already deployed. Then click the “Finish” button.
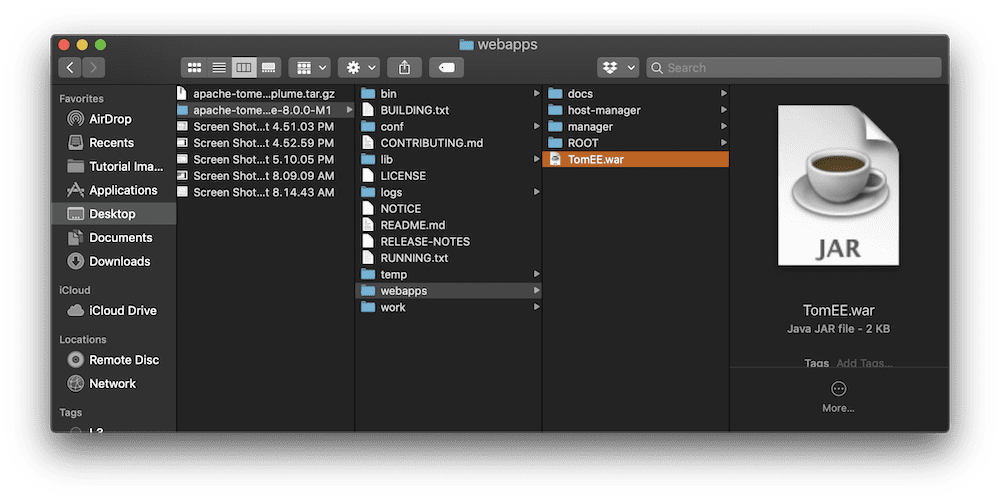
- You can check that the WAR file did, in fact, get exported to the TomEE server by going to the “apache-tomee-plume-” folder in Desktop and looking in the “webapps” folder. You should see a file named “TomEE.war”
Note: One of the times I did this the WAR file never appeared. If this happens to you just run the deployment over again starting at “3. Deploy the HelloServlet to the remote TomEE”. It should work the second time.
4. Test Your WebApp on TomEE
Once you are sure that the WAR file has been exported to the TomEE server, you can test it.
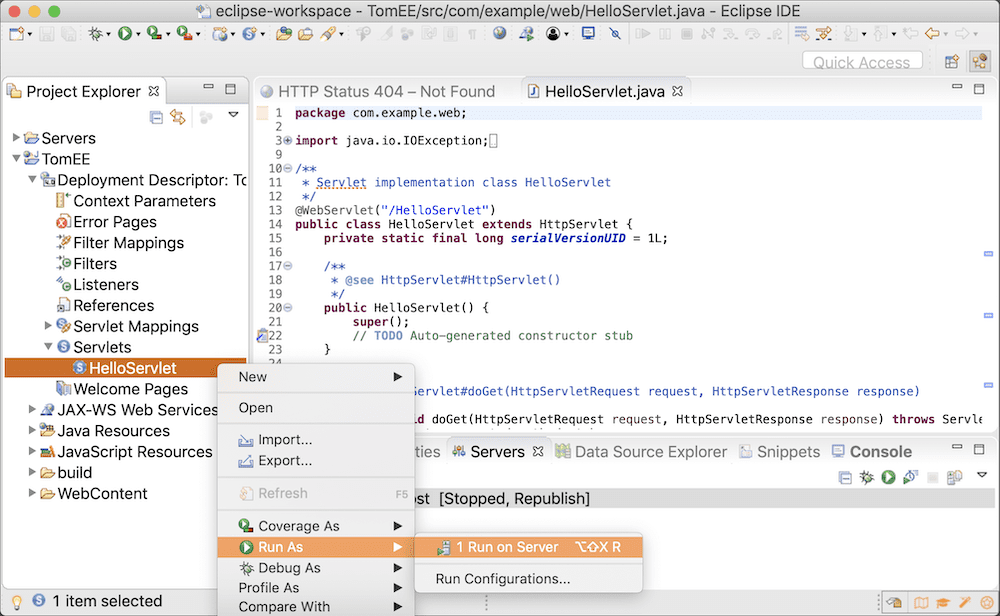
- Expand the item “Deployment Descriptor: TomEE” in the Project Navigator.
- Open the “Servlets” item and Right click on the “HelloServlet” and then click Run As – Run on Server.
- You should see a new tab on Eclipse with the title “http:\\localhost:8080/TomEE/HelloServlet”. Click on that tab and you should see the default output from the HelloServlet is “Served at /TomEE”. If you see it, it worked!
Section 6: Remotely Debug an App on TomEE with Eclipse
So now you’ve set up TomEE, the Eclipse IDE for Enterprise Java Developers, connected the them together, and successfully ran a program you developed. It’s time to get to the final stage of this article which is learning how to debug your code on a remote TomEE application server!
1. Modify the doGet() method code
- Open up the HelloServlet tab in the editor and go to the
doGet()method, which should look like the following:

- We are going to change the code in this method to reply to a query. The method will extract the query string from the URL used to invoke it and send it back as part of the response. The following shows what the code should look like once it’s changed.
protected void doGet(HttpServletRequest request, HttpServletResponse response) throws ServletException, IOException {

    // extract the queryString.
    String queryString = request.getQueryString();

    // Set the name value
    String name;
    if(queryString != null){
        name = queryString.split("=")[1];
    }else {
        name = "No one";
    }

    // return the response
    response.getWriter().append("Hello, " + name);
}- This code looks for a query string on the HTTP request. If there is no query string it returns “Hello, No one” but if there is and it contains the “name” it returns “Hello, <name>”.
- Right click on the code and select “Save”.
2. Run HelloServlet in the Eclipse Debugger
Let’s run this code in the debugger and see what happens. We can do this without stopping the server – its currently running without the debugger.
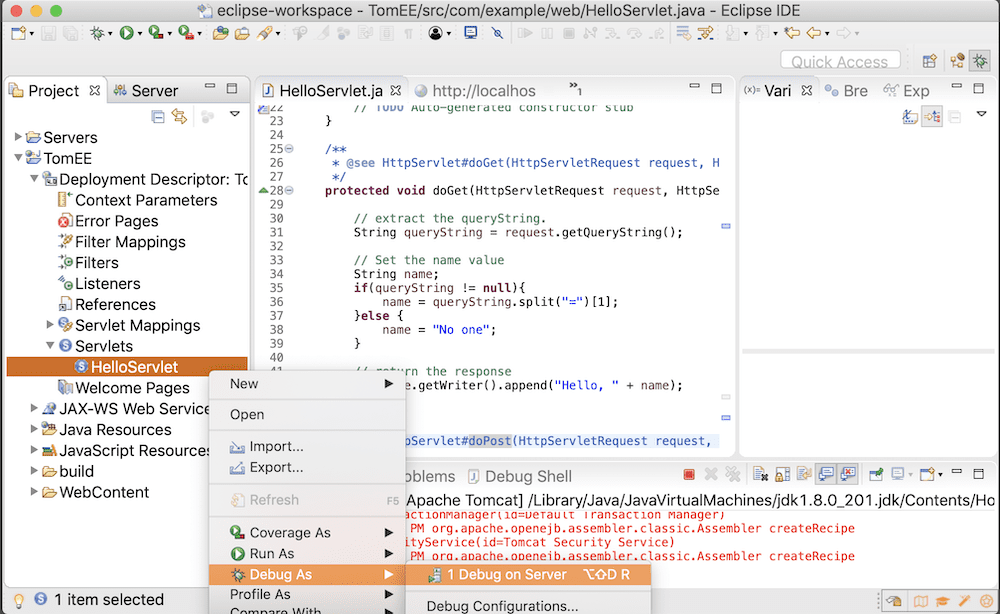
- Right click on the HelloServelt.java file again in the Project Navigator and select Debug As – Debug on server as shown below.
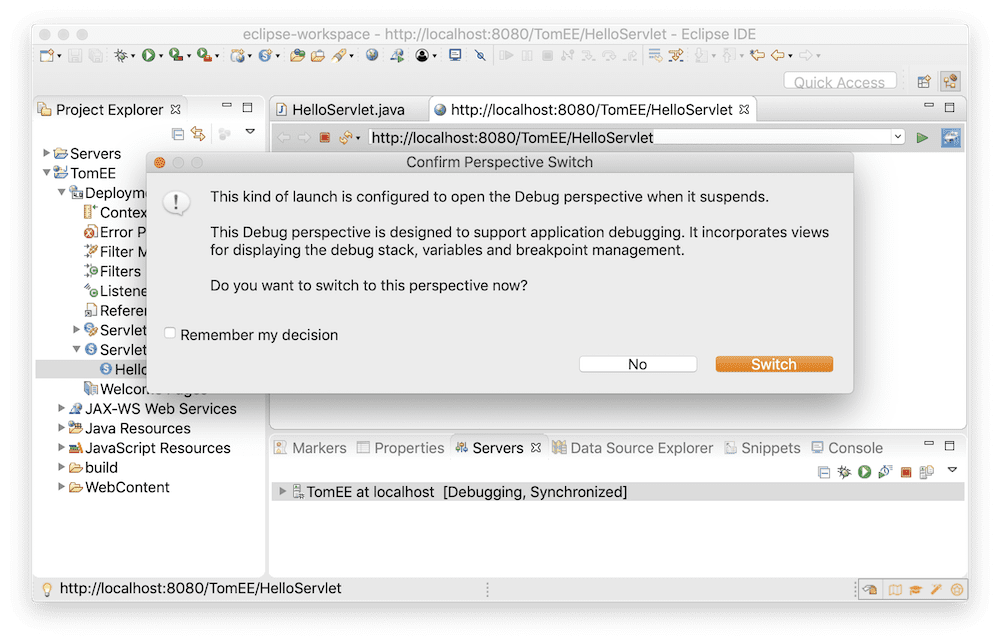
- If the server was already running you should see the following warning.
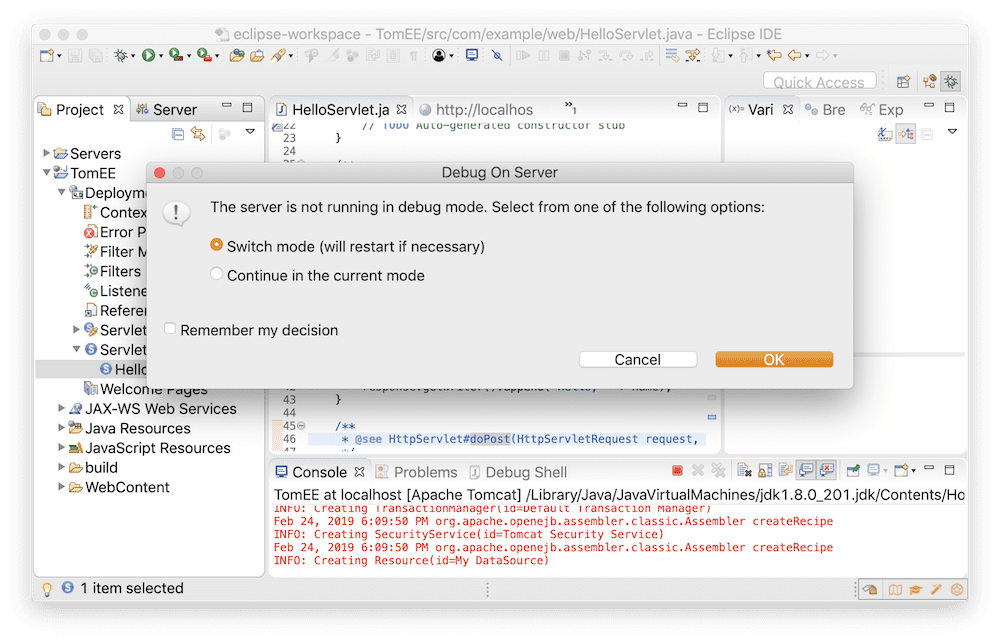
Note: Sometimes instead of telling you to switch it will just ask you if you want to restart the server. Assuming you chose to debug, agree to restart and continue on.
- You want to relaunch the server in Debug mode so click on “OK”.
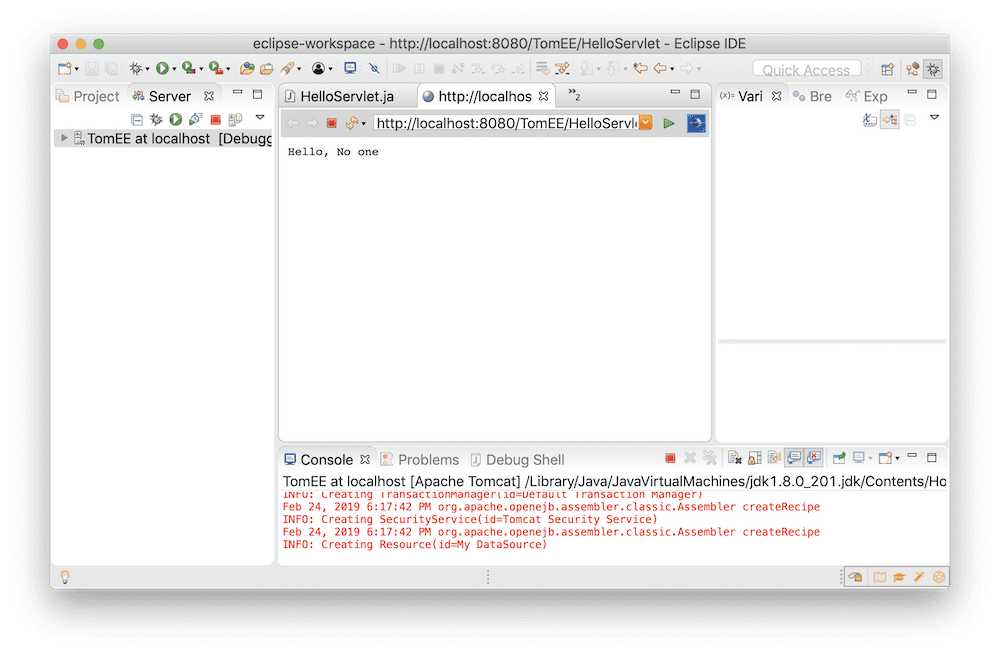
- If all has gone well, Eclipse will restart the TomEE server in debug mode and execute the doGet() method. The results should look as follows:
3. Add a Query String to the HTTP Call
Let’s change the URL call so that it does have a query string. That way we can get back a value that we send to the servlet.
- Click on the URL box at the top of HTTP tab. At the end of the URL add a query string so that the request looks like this “http://localhost:8080/TomEE/HelloServlet?name=Bob” where we add “?name=Bob” to the end as shown below.
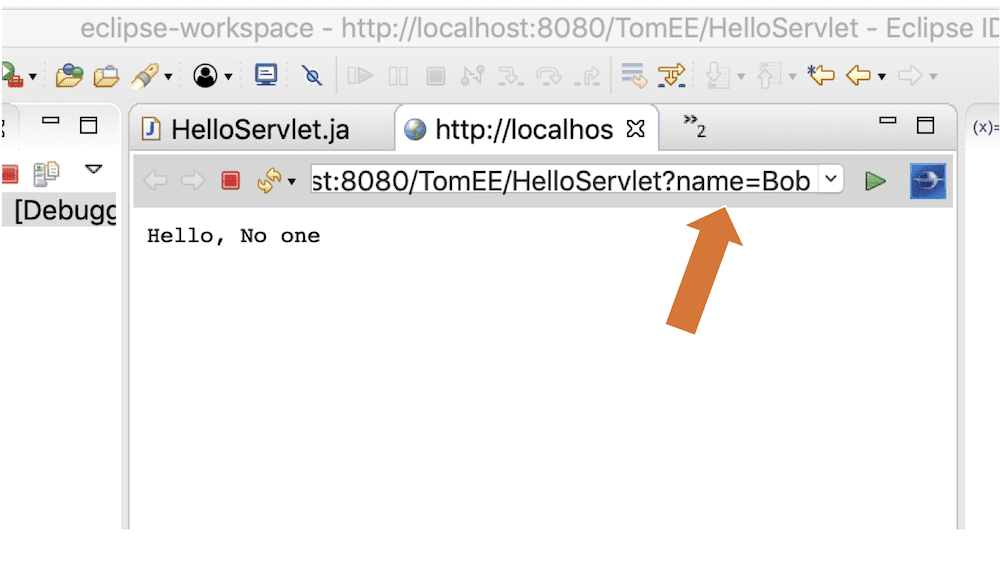
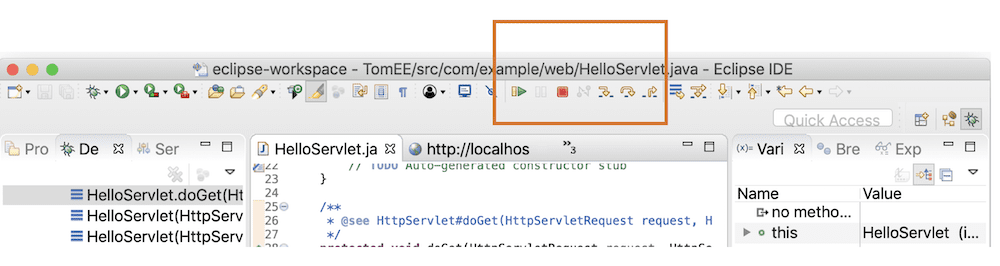
- With your cursor still in the URL field hit the green arrow (as shown below) on the right to send the new query.
![]()
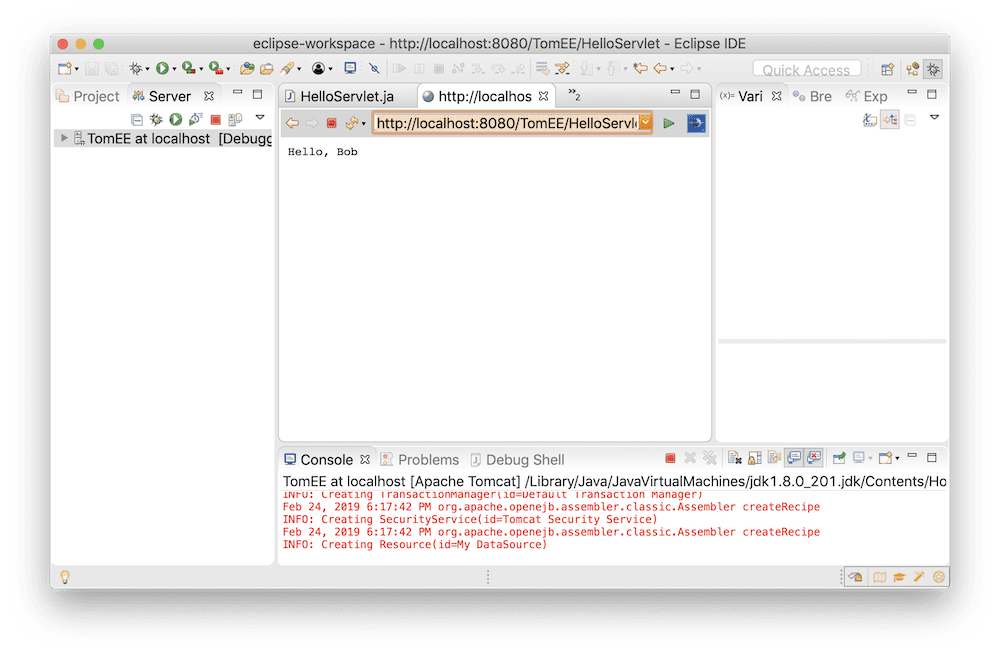
- You should see the return value with “Hello, Bob” as the text. If you do that means you successfully ran TomEE in the debugger!
4. Setting the Breakpoint on a Remote Web App
Now, let’s set a breakpoint and watch our code execute in real time on the server.
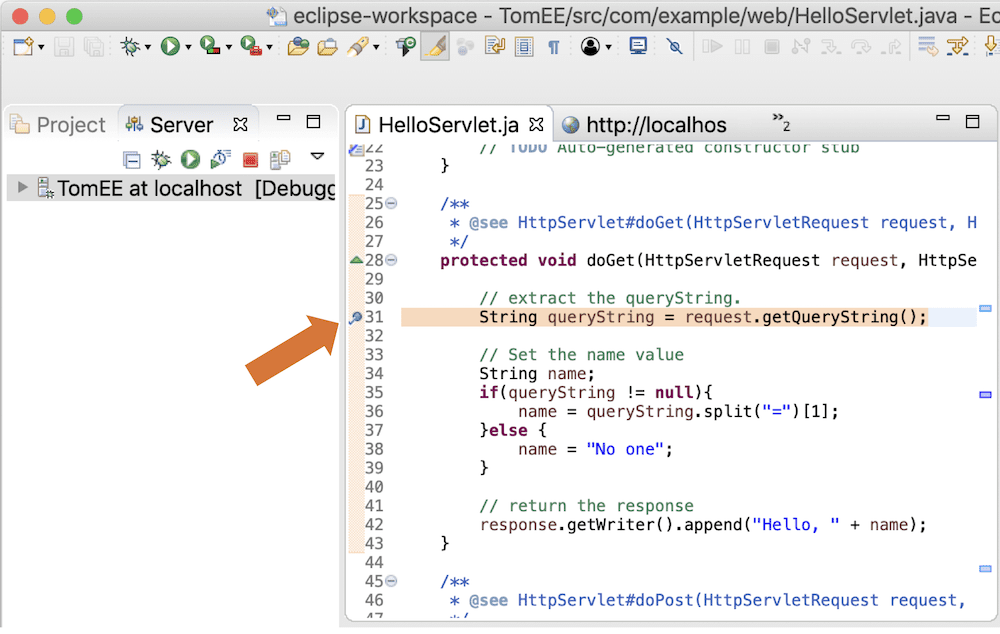
- Click on the HelloServlet.java tab above the editor to show your servlet code.
- Then double-click on the far left side of the editor pane next to the first line of code inside the doGet( ) method. This will set a breakpoint which appears as a blue dot as shown below.
- Now, click on the web browser tab and without changing anything (it should still have the “?name=Bob” at the end of the URL).
- Hit the green arrow to send the request to the server again.
Note: Before you can see the results you may see a warning that Eclipse is about to change to the debug perspective – you are currently in the server perspective. You want to do this so click on the “Switch” button.
Note: Once when doing this the IDE did not switch to debug mode. If this happens, then stop the server by clicking that stop button in the bottom panel and go back to and run it in debug mode again.
- If all goes well you should see the debugger open and the code pause its execution right at the breakpoint you set.
- You can now use the normal debugging controls to step through your code.
Note: If you run into a request timed-out error see the appendix Timeout Error after the conclusion of this article.
I’m not going to go into details here about how to debug in Eclipse, that’s a whole topic of its own. However, there is an excellent article, Java Debugging with Eclipse by Lars Vogel, that I used when I was learning how to debug in Eclipse. It was originally posted in 2009 but I’ve checked and it looks like Lars keeps it up to date.
Congratulations!
You have successfully installed TomEE and connected to it for remote debugging with the Eclipse IDE for Enterprise Java Developers! That was pretty cool, right?
In the future, we are going to post a more advanced article on debugging TomEE from an IDE when its located on a truly remote server – like in the cloud. Stay tuned!
Appendix
Addition materials in case you encounter a problem.
HTTP Timeouts
When I was working on this article I had a problem with debugging – the client kept timing out while stepping through the code.
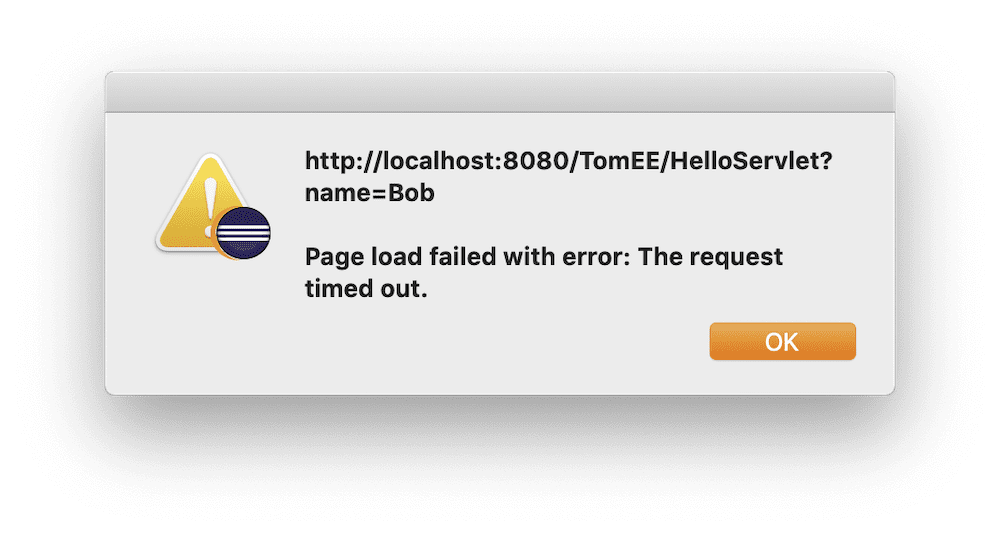
Obviously, this is not ideal. What was really odd was that the HTTP client was the one built into Eclipse. I was never able to find a way to switch that off, but eventually, it stopped happening (I love it when a problem fixes itself).
If the problem occurs and doesn’t go away, try a copy-n-past of the URL “http://localhost:8080/TomEE/HelloServlet?name=Bob” into your web browser and see if that helps. You could also download and install my favorite tool for testing Web APIs, Postman. The Postman application is a fantastic tool, but you don’t need to use all of its features just to test the app in this tutorial. Here is a quick and easy way to use Postman if you have had timeout issues or just want to see more information about the response.